The HP 9845 Emulator
Now the HP 9845 gets emulated. F. Ulivi has done a fantastic job, and he did it double-well. He did not just write an emulator, but also used the MAME/MESS emulator framework for making it real. In particular, Federico has done deep research on the (by far) hardest emulation challenge, the cartridge tape subsystem with the widely undocumented TACO chip and low-level cartridge tape format (chapeau!). I just added some of the code for the 98780A and the 98770A displays required for 9845T and 9845C emulation plus supplements such as artwork and sound samples.
There are a number of advantages for using MAME/MESS for this emulator:
- It runs on every platform supported by MAME/MESS (Windows, Linux, Mac OS etc.)
- It supports out of the box all the features of the MAME/MESS framework (various display rendering options, debugging, snap shots, user defined key mappings, pluggable ROMs, mass storage etc.)
- The large library of already emulated building blocks, callback structures and declarative configurations can be used to speed up development significantly
- Emulation can be VERY accurate. Mostly, the real hardware is emulated on a really low level (e.g. crystal clocks provide exact timings, every standard processor, controller or ASIC chip is emulated on its own). Every interface and bus slot is emulated towards its specs. Also the display can be tweaked to give a good impressions of real cathode ray tubes, even on LCD screens. Mass storage media are simulated on a magnetic flux level. Original floppy noise can be added, and much more.
As with every emulator, you can use the HP 9845 emulator to check HP 9845 software on a guest system without the real hardware. This can make software development, debugging and testing on the system in general much more convenient. Also, an emulator may be used as reference when trying to troubleshoot a real system. Last but not least, by writing an emulater like this you gain a near perfect understanding of the object you are dealing with.
But, there are also drawbacks. As I have stated at another place, emulators tend to demystify/profane the real hardware. You may think you are running the software on a real system, but it isn't the real system. You may compare it to current PCs, because it runs on your current PC, but the exceptionary role it once played, and the tremendous efforts for the design of the original system, and its complexity on hardware level all might not be tangible.
Anyway, we at least tried to make the copy as close to the original as possible, and it took more than a year to complete the work. The result is fully open source, and you are welcome to participate in the future development. See the MAME project on Github and have fun with the emulator. And please don't forget to report any bugs via the issue tracker on Github or the contact feature on this site.
Emulated Hardware
Federico's emulator simulates the following configuration:
- HP 9845B/C Model 100
- Two 16-bit hybrid processors (LPU, PPU)
- 64 kByte up to 448 kByte LPU RAM and 32 kByte PPU RAM
- Latest firmware revisions
- Dual tape option (T14 and T15)
- Internal printer option (thermo printer)
- 98750A monochrome display with standard graphics option (45B)
- 98780A monochrome display with hardware accelerated graphics (45T)
- 98770A color display with hardware accelerated color graphics (45C)
- Softkeys and light pen (45C and 45T only)
- U.S. and German keyboards
- Pluggable ROM options for up to 8 slots
- 98035A real time clock
- 98034A HP-IB interface
- 9895A dual floppy disk drive
Limitations and Trade-offs
- French, Spanish, Katakana and Swedish/Finnish had been available for a 9845 as an option, but the ROMs still need to get dumped
- CONTROL+STOP (soft reset) and auto-repeat key as well as the auto-repeat on arrow keys are not yet supported
- hpi format is not yet supported by imgtool
- Printer emulation does not recognize the PRT ALL key
Platform Specific Information / Known Issues
MS Windows:
- If you get a Direct3D error, try GDI instead (use the '-video gdi' option).
Linux:
- Some keys on non-U.S. keyboards are not recognized as input unless U.S. keyboard is enabled in Linux.
OS X:
- Yet untested
All platforms:
- 9895A emulation sometimes doesn't properly initialize when mounted with the MAME file manager, resulting in an Error 80 (no floppy in drive) message in BASIC when trying to access ":H7". Mounting the floppy disk with -flop1 or -flop2 on command line or re-mounting the floppy disk image in the MAME file manager usually helps.
Things to Come
Of course, some original tape spooling noise would be nice.
Later it might be interesting to extend the emulation to other models, e.g. the 9835A/B, the 9845A or the faster Model 200 bit slice processor (again tricky because of the soldered ROMs holding the microcode), or to support the 512K expansion RAM boards with up to 1.5 MByte RAM in total.
More peripherals may be added, e.g. AMIGO hard disk drives in combination with the 3rd party Mass Storage ROM from Structured Software Systems.
Preparations
Standard MAME/MESS is primarily a console application. Although there is a built-in GUI, and some custom GUIs are available, here the usage within a console window is described. For running the HP 9845 emulation, just the MAME executable is required, together with a set of complementary files such as firmware ROMs, artwork and sound samples, which you all can download from this site.
The executable is normally mame.exe, but also can be mame32.exe or mame64.exe, of course without the .exe extension under Linux. For simplification, we use just 'mame' as a command in this small tutorial. Normally, the distribution also includes utilities, such as floptool and imgtool. Especially imgtool is of essential use for the HP 9845 emulator when creating you own tape images.
Now here are the steps to get your emulator operational for MS Windows:
- The first thing you have to do is to get a MAME binary distribution for your system from the downloads section below. As an alternative, you of course also may download the latest official MAME distribution, see this link for the official Windows command-line binaries.
- Unpack the MAME binary distribution package into a directory of your choice.
And here are the steps to get your emulator working for Linux:
- There is not one place for downloading a Linux binary package, at least none that I have knowledge of. But there are pre-packaged bundles for some Linux distributions. Some properly install all required libraries with MAME, some don't. I would recommend to probe whether there is a pre-packaged bundle für mame with your system's standard installer i.e.
dnf info mame (Fedora)
yum info mame (other distributions supporting RPM based packages)
apt-cache show mame (Debian based Linux distributions such as Ubuntu)
- Now perform the installation. If there is a mame package for your system, you have two choices, you can use your system's package installer, or do it manually.
For me with my Fedora, 'sudo dnf install mame' works pretty well, it installs a ready-to-run MAME in /usr/share/mame with all dependencies. For other Linux distros you might need to figure out on your own which installer to use and - after installation - where the installer has placed the MAME home directory. As a hint, after installation you might use -showconfig to identify the MAME home directory, e.g. with
dirname `mame -showconfig | grep pluginspath`
Alternatively, you may create the MAME home directory manually whereever you like, download the MAME binary distribution from the downloads section below, unpack it in the newly created MAME directory, and install all required libraries manually. Beyond the standard libraries (like libc, libsstdc++, libjpeg etc.) which should be already present on your system, mainly Qt5, SDL2, asound, portmidi and lua might need extra install. Again this depends on the Linux distro you are using.
- Make sure that either the current directory or the MAME executables directory is included in your execution PATH environment variable, unless you want to use ./ as a prefix to every command.
For Mac OS X, here is how it works:
- You first need to install the SDL library before installing MAME. Please follow the instructions e.g. from here (downloads are 64-bit only): http://sdlmame.lngn.net
Once you have the binary executables ready, download the ROM files package hp9845-mame-roms.zip and the supplementory files package hp9845-mame-supplements.zip from the downloads section below into your MAME home directory, and unpack it.
There now should be all executable files in your MAME directory (or in your user executables system directory if a Linux installer has been used) as well as ROMs, artwork, samples and plugins in the appropriate subdirectories. A subdirectory 'tapes' is designated for 9845 tape images with extension .hti (HP Tape Minicartridge Image format), and another subdirectory 'disks' contains floppy disk images for the 9895A with extension .hpi or .mfi.
Now check that you have all required working ROMs with
mame hp9845b -verifyroms
mame hp9845c -verifyroms
mame hp9845t -verifyroms
(Remember to substitute 'mame' above with the actual executable you are using, e.g. mame.exe, mame64.exe or mame64)
Finally, register the plugin for creating extended custom keyboard mappings for all emulated devices with executing
register_plugin
Now your HP 9845 emulator should be ready for use. For your convenience, if you downloaded the binaries from this page, a small launch script is provided for each emulated device (named 45b, 45c, 45t, 45b_de, 45c_de, 45t_de) which includes the most common command line options. So you may e.g. simply run
45b [<more options>]
to quick-launch the HP 9845B emulator. In the following section, the emulator usage is described in detail.
Getting Started
After completing the steps above you can run the HP 9845 emulator with
mame hp9845b [<options>]
The emulation then looks basically like this:
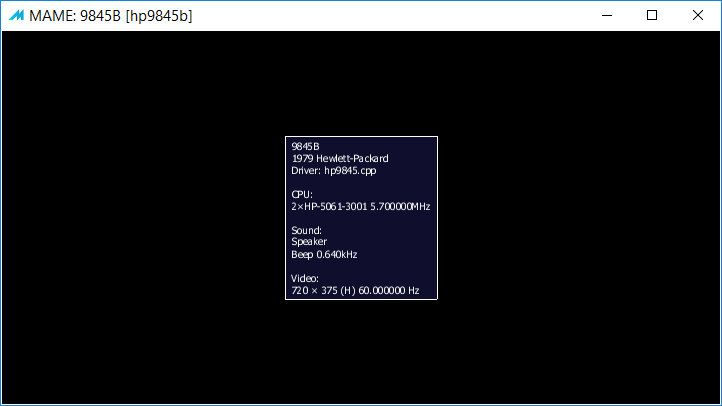
Cool, eh? A 1979 computer with two 16-bit processors inside, clocked at 5.7 MHz!
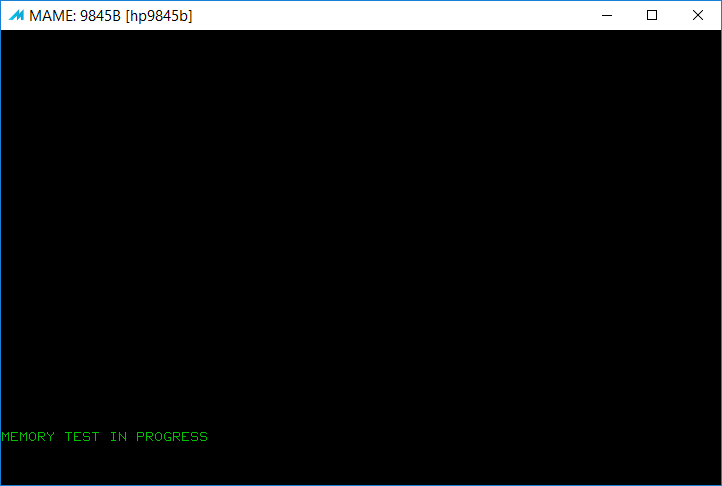
Now press any key to start emulation. The HP 9845 first performs a self test:
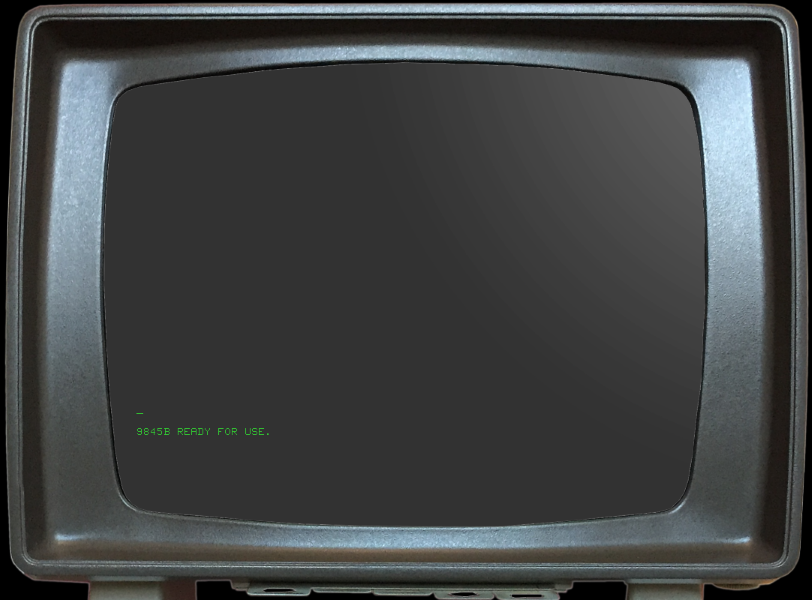
and then, after finishing, shows a system ready message:

Check the emulator by first typing LIST and then pressing RightCtrl + Enter (=EXECUTE key) or just Enter on the numeric key pad. You now should see:
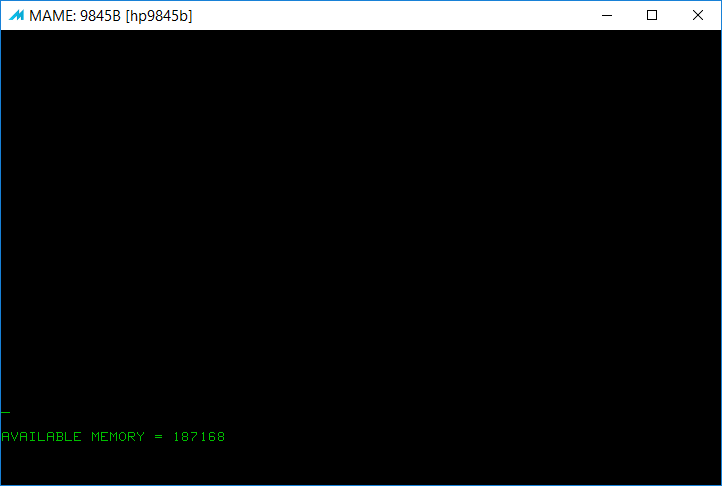
The exact amount of available memory slightly depends on the Option ROMs installed. To emulate a HP 9845B with all Option ROMs installed except the Test ROM (also see Option ROMs Section below), use
mame hp9845b -rom1 asmdev -rom2 graphics -rom3 iolpub -rom4 ioppuc -rom5 massd -rom6 advprog -rom7 strucprg
Most special configurations can be made editable & persistant by creating a file mame.ini with
mame -createconfig
and editing the settings in mame.ini afterwards.
Use
mame -showusage
to output a summary of all available options. Also consult http://docs.mamedev.org for more information on the MAME user interface.
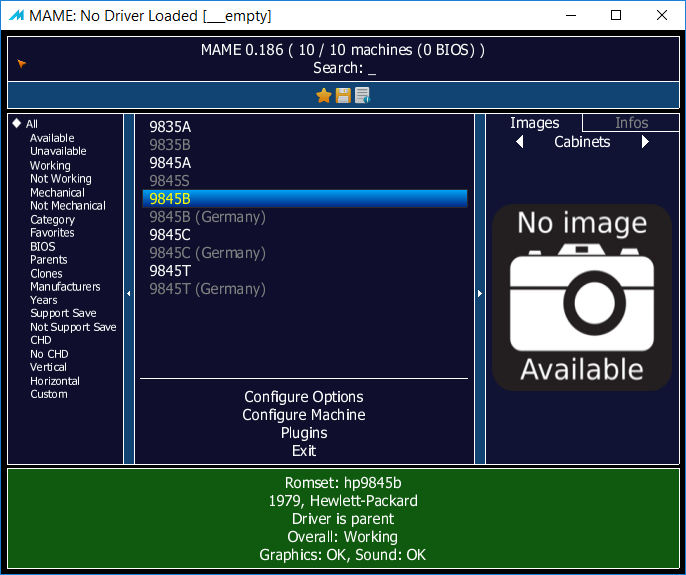
Starting MAME without specifiying the emulated device (here hp9845b) will launch the MAME start menu, where you may select different other emulations (as far as available) and options:
Once the emulator is running, you may load and save programs and data to and from the integrated tapes (see Tape Section below for details). With some additional command line options, you also may attach a 9895A dual floppy drive via a 98034 HP-IB interface (see Floppy Section below).
To exit the emulation, first toggle to PARTIAL EMULATION with the Scroll lock key, then press Esc. If you are running the emulation in a window instead of full-screen, you also can use the standard window decoration function to close the emulation window (see next section for how to run the emulation in a window).
Appearance
Use the '-window' command line switch to launch emulation in a window instead of full-screen.
The '-nomax' option will make sure the window will start out at the smallest supported size, i.e. all pixels are mapped 1:1.
The '-nounevenstretch' option makes sure that the aspect is always correct, so that 9845 pixels are properly matched to your display's pixels and not distorted even if you resize your window.
If using the -window option, it is recommended to use all options above in combination for best appearance.
MAME supports the use of bezel decoration, which is part of what is called called 'artwork' within MAME. If you like, you can run the emulator with a bezel image of a 98750A, a 98770A or a 98780A monitor. Makes the emulation a bit more look like the real hardware and you may use the softkeys built into the 98770A and the 98780A monitor bezels. You may switch it on with -bezel, or off with -nobezel. The artwork files need to be present in the artwork directory.
MAME actually has many more rendering options which can be used to tune the video display, see http://docs.mamedev.org for more information.
OSD Menu
Most options may be specified via command lines switches. But MAME provides a built-in onscreen menu, the OSD menu, which also may be used to do certain configurations, to install interfaces or to mount images.
To activate the menu, first switch the emulator to PARTIAL EMULATION mode with Scroll-lock, then hit the TAB key. The menu shows up like this:

For the HP 9845 emulation, the following menu items are of some relevance:
| Input (this machine) | Shows all current keyboard, softkey and lightgun/lightpen mappings. Can be customized by the user. |
| Analog Controls | Adjust the lightgun sensitivity settings. |
| Dip Switches | Configure the DIP switch settings (e.g. the HP-IB address or the system controller function of the 98034 HP-IB interface) |
| Machine Configuration | Alter the select codes of the installed interfaces, as well as the HP-IB address of the emulated HP-IB devices (currently the 9895A floppy disk drive). |
| Image Information | Shows an overview of the floppy and tape images currently mounted. Also shows the currently installed ROMs. |
| File Manager | Create new floppy or tape images, or mount existing images. Provides several options, e.g. image formats or mounting read-only. |
| Slot Devices | Shows an overview of the existing slots, and which devices are currently assigned to those slots. Assignments can be changed in this menu. |
| Keyboard Mode | Switch between EMULATED and NATURAL keyboard modes (see next section for details). |
| Slider Controls | Adjust sound and screen parameters (such as beep volume or screen brightness) to your preferences. |
| Video Options | Change screen orientation or switch on/off bezel. |
| Crosshair Options | Change crosshair visibility for the lightpen emulation. |
After leaving the OSD menu, don't forget to re-enable FULL EMULATION mode again with Scroll-lock.
Keyboard
You may toggle between PARTIAL EMULATION and FULL EMULATION with the Scroll lock key.
Full Emulation
FULL EMULATION provides mappings of all 9845 keys, including:
| HP 9845 | PC | HP 9845 | PC | HP 9845 | PC | ||
| TAB SET | RightShift + Tab | k0 | RightCtrl + 1 | CLEAR LINE | RightCtrl + Num 7, RightShift + End | ||
| TAB CLEAR | RightCtrl + Tab | k1-k12 | F1-F12 | RESULT | RightCtrl + Num 4 | ||
| TYPWTR | RightCtrl + Ins | k13 | RightCtrl + F10 | EXECUTE | Num Enter, RightCtrl + Enter | ||
| STEP | RightCtrl + Page Down | k14 | RightCtrl + F11 | NUM E | RightCtrl + Num / | ||
| DEL LN | RightShift + Del | k15 | RightCtrl + F12 | NUM ( | RightCtrl + Num 8 | ||
| INS LN | RightShift + Ins | TAB | Tab | NUM ) | RightCtrl + Num 9 | ||
| PRT ALL | RightCtrl + Home (toggle) | CONTROL | Ctrl | NUM ^ | RightCtrl + Num - | ||
| RECALL | RightShift + Page Up | SHIFT LOCK | Shift Lock | NUM = | RightCtrl + Num 1 | ||
| DEL CHR | Del | SHIFT | Shift | NUM / | Num / | ||
| INS CHR | Ins | BACKSPACE | Backspace | NUM * | Num * | ||
| AUTO ST | RightCtrl + End (toggle) | STORE | RightShift + Enter | NUM - | Num - | ||
| CLEAR | RightShift + Home | REPEAT | n/a* | NUM + | Num + | ||
| CLR→END | End | STOP | Esc | NUM . | Num . | ||
| HOME | Home | RESET | n/a* | NUM , | RightCtrl + Num . | ||
| ROLL UP | Page Up | RUN | RightShift + Page Down | NUM 0 - NUM 9 | Num 0 - Num 9 | ||
| ROLL DOWN | Page Down | PAUSE | RightShift + Esc | ||||
| CONT | Enter | ||||||
*) The combination of CONTROL+STOP on the HP 9845 is implemented in hardware and can't be triggered in software, so Ctrl + Esc on the PC would not automatically initiate a soft reset. Same applies to the REPEAT key.
Notes:
- RightShift and RightCtrl are used as modifiers within our emulation to free up the use of SHIFT (mapped to LeftShift) and CONTROL (mapped to LeftCtrl) to the HP 9845. Support for RightShift and RightCtrl is added via the boot.lua plugin in the appropriate config file (see preparations).
- Since there are no keys to be latched on the PC keyboard, this behavior is simulated for the PRT ALL and the AUTO ST keys by toggling the current state with RightCtrl + Home and RightCtrl + End keys. The two-way function of the arrow keys (pressing them fully down on the original system generates repeated key strokes) is not yet emulated.
- Most other keys (including arrow keys) map 1:1.
Partial Emulation
PARTIAL EMULATION allows to use the standard MAME key mappings für special functions (e.g. Tab for MAME menu, F3 for reset or Esc to quit emulation), but reduces mappings to 9845 keys so that not every 9845 key will work any more. Note that when in PARTIAL EMULATION mode, the use of the key P pauses emulation (hit P again to resume).
International Keyboards
If you are using a non-U.S. keyboard, but like to match the labels on your PC keys, you might want to use the '-natural' option, which enables the so-called Natural Keyboard mode in MAME, mapping most of the MAME keys properly to your keyboard layout. Please note that still an HP 9845 with U.S. keyboard is emulated unless you are using the international versions (see German keyboard below), so don't expect to see the special characters of your keyboard within the emulation. Another restriction is that all RightShift and RightCtrl combinations in the above table won't work.
If you are using an international keyboard with your PC, but not the Natural Keyboard option, it is recommended to switch your keyboard to U.S. English layout, otherwise some keys might not be available. An exception is the German keyboard (see next section).
International keyboard layouts for a HP 9845 had been available as ordering options, and require special firmware versions. Apart from the U.S. keyboard, currently only the German keyboard ROM has been dumped.
German Keyboard
If you are using a PC keyboard with German layout, you may want to emulate the native German keyboard layout option of the 9845, as it was once offered by HP, with keys for umlauts and ß. In that case, you need to select hp9845b_de, hp9845t_de or hp9845c_de (instead of hp9845b, hp9845t and hp9845c) as drivers for emulation.
Please note that on the German HP 9845 keyboard some keys from the U.S. keyboard were not available (~, {, } and \ were missing). Also, the section sign § - although common on German keyboards - was not available on the German HP 9845 keyboard. The ^ could only be found on the keypad.
In the emulation, the # can be found on Shift+3 as it is with the original HP 9845 keyboard.
You may use the Natural Keyboard option with hp9845b_de, hp9845t_de or hp9845c_de, but any combination with RightShift or RightCtrl will not be available.
Softkeys
The 45C and 45T emulations also implement the softkeys integrated into the monitor bezel. The concept behind the softkeys is to provide eight hardware buttons which can be dynamically labeled under software control, such implementing dynamic menus. One example for extensive use of softkeys is the 45C Demo Program.
You can activate the softkeys by clicking on the appropriate bezel buttons (MAME bezel needs to be enabled, e.g. with the -bezel option, and emulation must run with -window option, for obvious reasons). HP BASIC also supports activating the softkeys as special function keys k24 to k31, which can be reached by SHIFT + k8 to SHIFT + k15.
Tape
Use the command line option '-magt1 <tape-image-file>' to mount <tape-image-file> to :T15 (the default drive), and '-magt2 <tape-image-file>' to mount <tape-image-file> to :T14, e.g.
mame hp9845b -magt1 tapes/exer1.hti
Alternativly, a tape can be assign tape via MAME file manager menu (loading/unloading/creation during the emulation). The file manager menu can be reached by first making sure PARTIAL EMULATION is enabled (use the Scroll lock key to toggle it on or off) and then using the TAB key to enter the MAME menu. Changing tapes during an emulation can be done via the file manager only. Don't forget to re-enable FULL EMULATION afterwards.
The tapes then can be accessed within the emlator with MSUS ":T14" and ":T15". Before use, a new tape image created within the MAME file manager needs to be formatted with INITIALIZE ":T14" or INITIALIZE ":T15", respectively. Tape images created with the Imgtool already have been initialized. There is a newly initialized tape image provided as tapes/blank.hti.
Tape moves are indicated with an on-screen display showing the current track (A or B), whether it is a read (R) or write (W) operation, the direction and speed of the move and the current record position.
The following tape images are provided with the emulator in the tapes subdirectory:
| blank.hti | newly inititialized tape image |
| demo1.hti | HP 9845C demo (tape 1) |
| demo1lp.hti | HP 9845C demo (tape 1 with light pen support) |
| demo2.hti | HP 9845C demo (tape 2) |
| exer1.hti | HP 9845B/C exerciser (tape 1) |
| exer2.hti | HP 9845B/C exerciser (tape 2) |
| fldemo.hti | François Lanciault's demo for the HP 9845T |
| tbin.hti | test binary tape (diagnostics) |
Tape Images
Use imgtool to create an empty formatted tape image:
imgtool create hp9845_tape <tape-image-file>
Use imgtool to add a 9845 file to a formatted tape image:
imgtool put hp9845_tape <tape-image-file> <source-file> <target-file>.<type> [--wpr=<words-per-record>] [--filter=9845data]
with <target-file> for 9845 file name as it will be shown via the CAT command (case sensitive, 6 characters max.) and <type> one of DATA, PROG, BPRG or KEYS.
The '--wpr=<words-per-record>' option must be specified if the target file shall have a record size other than the standard size of 128 words (=256 bytes).
The '--filter=9845data' switch can be optionally added to convert DATA files from HP9845 ASCII to Windows ASCII and vice versa.
Use imgtool to list files within a tape image:
imgtool dir hp9845_tape <tape-image-file>
Use imgtool -h for more options, or see the MAME online documentation for detailed information.
Using hpi Tape Images
You cannot directly mount hpi tape images with the current version. Use HPDir to unpack the files into an empty directory (see HPDir Project), then use imgtool to re-pack them into an previously initialized hti tape image file. Due to the limited capacity of a 9845 cartridge tape, you may have to use more than one tape image.
Note that if a file has a record size other than 256 bytes, HPDir by default adds &<recordsize> to the file name, with <recordsize> the size of the record in bytes. Those files need to be added to a hti tape image without the &<recordsize> in the filename, also the --wpr=<words-per-record> option must be used, where <words-per-record> is half of <recordsize>.Floppy Disk
There is support for virtually connecting a HP 9895A dual floppy disk drive via a HP 98034A HP-IB interface to the emulated HP 9845. Floppy disks provide much faster access to individual files, and offer more than four times the capacity of a tape. Also, the general read/write performance is superior.
The emulated 9895A offers two 8" floppy disk drives with 1.2 MBytes each.
The 9895A is attached to a HP 9845 with the -slot command line option (note also the mass storage Option ROM is required):
mame hp9845b -rom1 massd -slot0 98034_hpib -slot0:98034_hpib:ieee_dev hp9895
Up to two floppy disks then can be assign tape via MAME file manager menu (loading/unloading/creation during the emulation). The file manager menu can be reached by first making sure PARTIAL EMULATION is enabled (use the Scroll lock key to toggle it on or off) and then using the TAB key to enter the MAME menu.
Within the file manager, you may assign images to the floppy drive as follows:
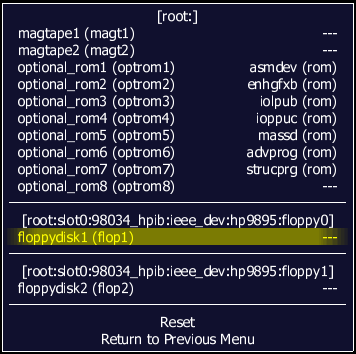
Currently only hpi image files and image files in MESS floppy image (MFI) format may be mounted. Pre-initialized floppy disk images are supplied with the romset (see downloads below) under disks/blank.hpi and disks/blank.mfi.
Direct mounting of image files can be done on the command line with -flop1 <image> for the first drive or -flop2 <image> for the second, e.g.
mame hp9845b -rom1 massd -slot0 98034_hpib -slot0:98034_hpib:ieee_dev hp9895 -flop1 disks/empty.hpi
Changing floppy disks during an emulation can be done via the file manager only. Don't forget to re-enable FULL EMULATION afterwards.
The 9895A then can be accessed within the emlator with MSUS ":H7". Before use, a new floppy disk image needs to be formatted with INITIALIZE ":H7".
Please note that mounting floppy disk drives with the MAME file manager is not yet fully stable. If you encounter Error 80 during access, the floppy disk was not correctly mounted (even if the MAME messages tell something different). Try re-mounting the image within the MAME file manager (go to the file manager, choose '[empty slot] to unmount, confirm, then select the file of your choice).
Floppy sound is enabled by default. If you don't want floppy sound, use the -nosamples option, or simply remove the sound samples from the samples/floppy/ directory.
There is a large number of hpi floppy images with diverse software packages available for download in the Software Section.
Of course the floppy disk support may be combined with one or two tapes.
The following floppy images are provided with the emulator in the disks subdirectory:
| blank.mfi | newly inititialized image in MFI format |
| blank.hpi | newly inititialized image in hpi format |
| exerciser.hpi | HP 9845 B/C exerciser, plus TBIN diagnostics package |
| demo.hpi | HP 9845C demo, plus FLDEMO for the HP 9845T |
I recommend to execute
MASS STORAGE IS ":H7"
on the HP 9845 before running any of the programs included on floppy disks. Otherwise, you may encounter a file not found error, if the program searches on the default device which is the :T15 tape cartridge drive. If there are still errors, search the program source code for "MASS STORAGE IS" statements and adjust them appropriately.
Using hpi Disk Images
hpi images are fully supported for emulation, as long as they are really 9895A images, i.e. match the size of either 1,182,720 bytes (full 77 cylinders, including spare tracks) or 1,152,000 (75 cylinders, without spares). In contrast to HPDrive, it is not possible to mount hpi images which do not exactly match the size of a 9895A floppy.
Freshly initialized hpi images can be created either with the "create" function of the MAME file manager and subsequent formatting with INITIALIZE within the emulation, or with HPDir by
hpdir -initialize <imagefile>
You also may use
floptool convert [input_format|auto] output_format <inputfile> <outputfile>
to convert between hpi and other image formats (use floptool without arguments for a complete list).
The use of imgtool for adding/deleting/extracting individual files with hpi images is not yet supported. Please use HPDir for this purpose (see HPDir Project), or use imgtool with MESS floppy image format (MFI).
Printer
The internal printer can be used for both text and graphics output. Many applications for instance implement a function to produce screen dumps to the printer.
Screendump Created with the Internal Printer
Now MAME currently doesn't offer directly linking emulation to the printer subsystem of the guest computer. So, for the emulation, output is redirected into a file of your choice. Currently there are two modes supported, ASCII Mode and Pixel Mode. In Pixel Mode, every pixel is written into the output file just as it is printed on the real internal printer. Actually, every set pixel is represented by an asterisk (*), and every unset pixel by a space. In ASCII Mode, the output is translated into ASCII characters, thus providing a format easier to read. Obviously you need to select the Pixel Mode if you want graphics output.
Select ASCII Mode by adding the following option to your command line:
-bitb1 <output-file>
Select Pixel Mode by adding another option to your command line:
-bitb2 <output-file>
You can convert the resulting output file (the one where every pixel is represented by a '*' character) into a PNG image with a small Python script deco_print_bitb.py:
python deco_print_bitb.py <output-file> <png-file>
The Python script requires Python 2.7 or higher and the Python Image Library (PIL) to be installed.
Option Memory
The real HP 9845 Model 100 came with 64K RAM for the LPU as minimum configuration. RAM could be expanded by 128K modules to 192K, 320K or 448K. The emulator defaults to 192K, however the emulated LPU RAM size can be customized with the -ramsize option:
mame hp9845b -ramsize <size>
with <size> one of 64K, 192K, 320K or 448K. Note that with more RAM installed, also the power-on selftest will take more time.
Option ROMs
Use the command line options '-rom1 <romfile>' to '-rom8 <romfile>' to assign ROM slots 1 to 8 to Option ROMs. The order actually is of no relevance, the ROMs are automatically mapped to the proper address space.<romfile> can be one of
| advprog | Advanced Programming |
| asmdev | Assembler Development & Execution |
| graphics | Monochrome Graphics |
| colorgfx | Color Graphics |
| enhgfxb | Enhanced Graphics Rev. B |
| iolpub | I/O LPU Rev. B |
| ioppuc | I/O PPU Rev. C |
| massd | Mass Storage Rev. D |
| strucprog | Structured Programming |
| test | Test ROM with diagnostics used by HP's service personnel |
The 9845B needs 'graphics', whereas the 9845T and 9845C should use 'enhgfxb'. The 'colorgfx' works with a 9845C only, and lacks features like rubber band.
Using the Light Pen
The 9845 did not have support for computer mice yet, however the light pen had been a high precision positioning tool, which provides an even more intuitive way to interact with a program. The 9845 light pen had been the result of a tremendous engineering effort, which finally yielded in a tool, capable of picking as well as tracking with single pixel accuracy (a goal sometimes even not reached by contemporary mouse devices).
The light pen feature can be enabled in MAME with the '-lightgun -lightgun_device mouse' option (note MAME calls it lightgun, not lightpen). The position of the light pen is shown with a blue pulsing cross hair:
Please note that the light pen option is supported for the HP 9845T and HP 9845C only. If you are wondering why the crosshair sometimes jumps a little bit when in tracking mode, this is related to the way the light pen position was predicted by the firmware even if no background picture was available as a light source.
The lightgun option normally grabs the mouse completely. To release and use the mouse cursor again, change focus with the keyboard to another application, e.g. with Alt+Tab.
Interfaces
Use the '-slotx <interface>' command to enable a 9845 interface, with 'x' one of 0,1,2,3. Currently, the following interfaces are implemented:
| 98034_hpib | HP98034A HP-IB revised interface with select code 7 |
| 98035_rtc | HP98035A real time clock with select code 9 |
Note that as with the original hardware, there are 4 slots, so a maximum of four interfaces may be installed (actually we currently have two interfaces with fixed selection codes).
The default select codes can be changed within the MAME OSD menu under 'Machine Configuration'.
Screenshots
Normally, screenshots are taken within MAME simply with F12. Because F12 is by default mapped to the k12 key, here the procedure is slightly different. If you like to take screenshots from the running emulator, please follow these steps:
- Switch to PARTIAL EMULATION mode with Scroll-lock
- Pause emulation with the P key
- Create a screenshot with F12
- Continue emulation with again pressing the P key
- Switch to FULL EMULATION mode with Scroll-lock
Otherwise, F12 will be sent to your emulator, which activates the k12 key on the HP 9845.
The screenshot will be saved as PNG file in the snap subdirectory.
Recording
Likewise, you may create a recording of your emulation session. MAME is capable to capture all user inputs, store them into a file, and use that file to replay all inputs for another session. Simply follow these steps:
- Run your emulation with the '-rec <filename>' option. All inputs now get recorded into <filename> in the inp subdirectory, e.g. with
mame hp9845b -rec myrecording.inp
- Terminate emulation, and re-run playback with '-playback <filename>' option, e.g. with
mame hp9845b -playback myrecording.inp
If you like, you also can create an AVI file from the recording. Simply add the option '-aviwrite <filename>' to step 2 above, and MAME will create an AVI file in the snap subdirectory, e.g. with:
mame hp9845b -playback myrecording.inp -aviwrite myvideo.avi
Alternatively, you also may create an MNG file with
mame hp9845b -playback myrecording.inp -mngwrite myvideo.mng
Note that AVI files as produced by MAME are uncompressed and may get HUGE (multiple gigabytes) quite quickly, whereas MNG saves in a much more economic way. I have not yet found a really usable MNG player (preserving the 1:1 pixel mapping), though. So you probably will need to convert both the AVI and the MNG output to a more common, compressed video format after recording with some other tool.
Testing the Emulation
Fortunately Hewlett Packard did provide extensive test procedures for verifying the proper function of the hardware, so we are just re-using those for testing the emulator. The procedures below are for the HP 9845B, however the tests and exercisers also are applicable to the special 45C and 45T hardware.Test ROM with Test Binary
One of the Option ROMs is intended for testing the core functions of an HP 9845. HP's service personnel normally used a Test ROM in combination with a Test Binary Program in the field for on-site diagnostics. Usage of Test ROM and Test Binary is documented in the Desktop Computer Service Manual for the HP 9845B/C (part no. 09845-91030) from hpmuseum.net. You can run the emulator with both Test ROM and Test Binary Tape installed with the following options:
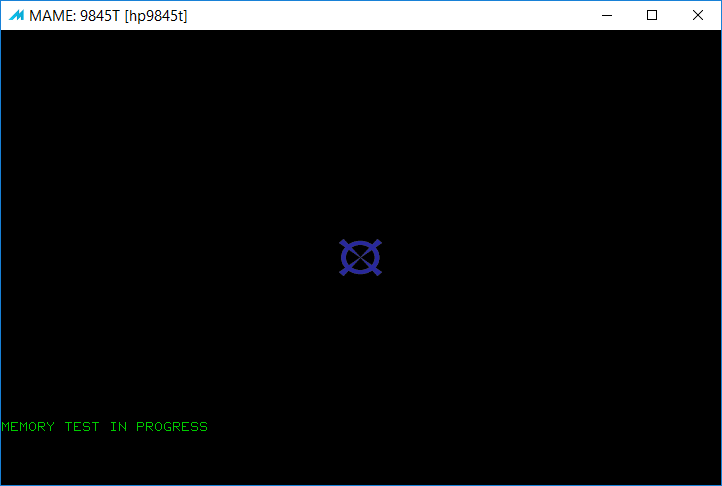
mame hp9845b -rom1 test -magt1 tapes/tbin.hti
Now the HP 9845 performs several automatic tests on the processors (PPU, PPU) and memory:
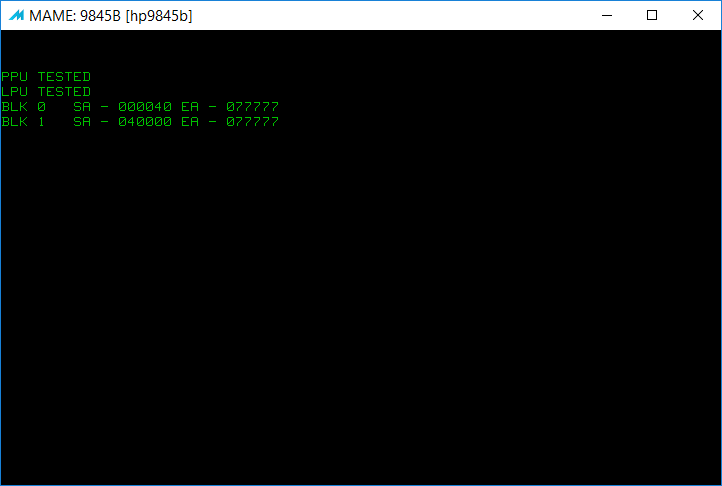
When all tests have been successfully passed, the screen shows:
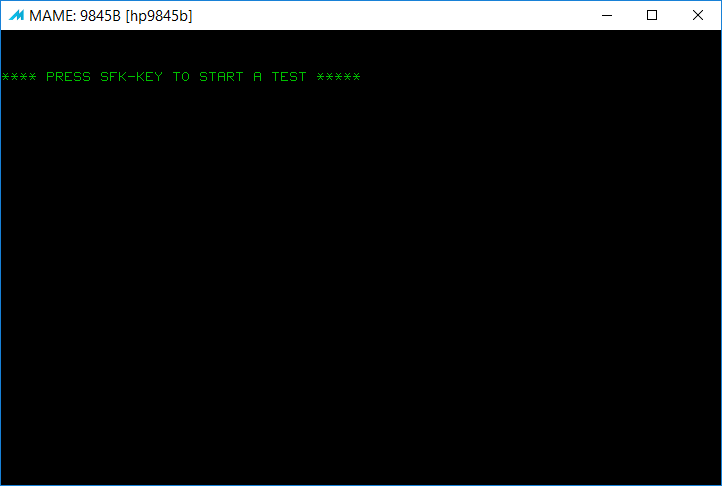
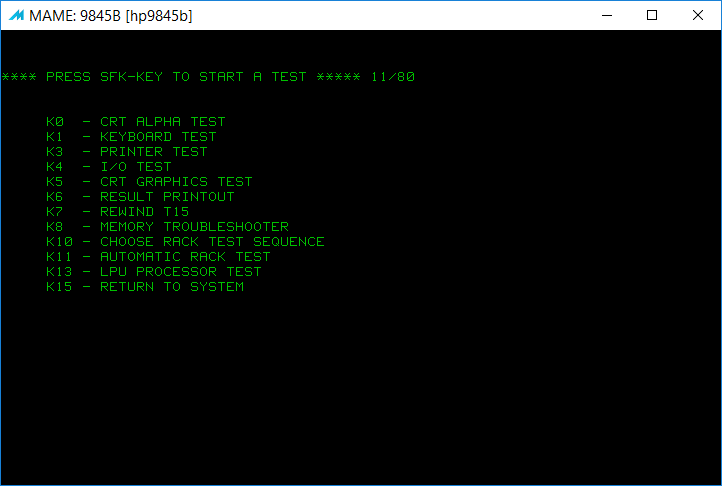
Now several tests on the different functional building blocks can be run by pressing the appropriate function key:
Exerciser Suite
More test options are available with the user exerciser tapes which had been distributed with every HP 9845B/C. Usage of the exerciser is documented in the HP 9845B/C Installation, Operation and Test Manual (part no. 09845-93005) from hpmuseum.net. Start emulation with
mame hp9845b -magt1 tapes/exer1.hti
for the first tape (tape #1, most tests are on that tape) and
mame hp9845b -magt1 tapes/exer2.hti
for the second tape (tape #2, additional tests are stored on that tape).
In either case, wait until the 9845 has completed power-on self test, and when '9845B READY FOR USE' is displayed, enter
LOAD "AUTOST"
and press Ctrl + Enter (=EXECUTE key) or just Enter on the numeric key pad. When loading is finished, press RightShift + Page Down key (=RUN key). Now when being asked for 'Do you want PRINTED output (Y,N)?' just press the normal Enter key (=CONT key).
If you loaded and run AUTOST from exerciser tape #1, you will see:
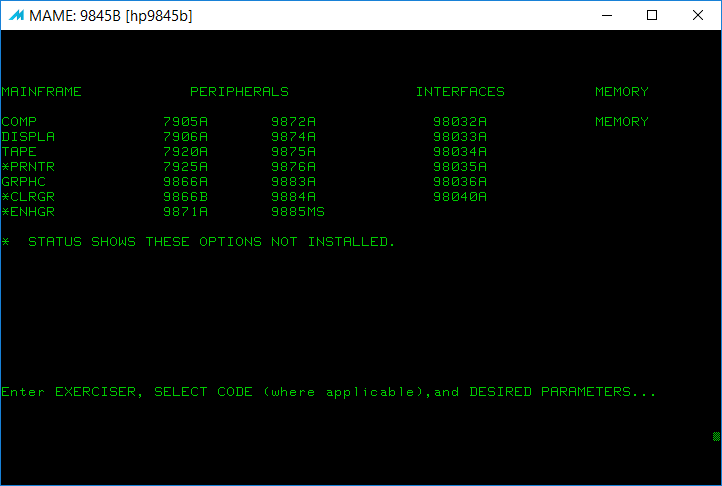
If you loaded an run AUTOST from exerciser tape #2, you will see:
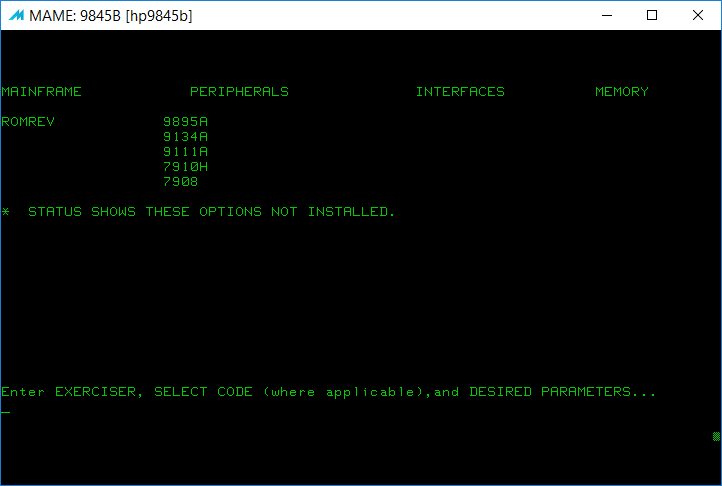
Now simply type in the desired exerciser and press Enter. Note that availability of GRPHC (98750A), CLRGR (98770A) and ENHGR (Enhanced Graphics Option ROM) depend on the display option and Graphics Option ROM installed. See the HP 9845B/C Installation, Operation and Test Manual for instructions on the individual exercisers.
HP 9845T Demo
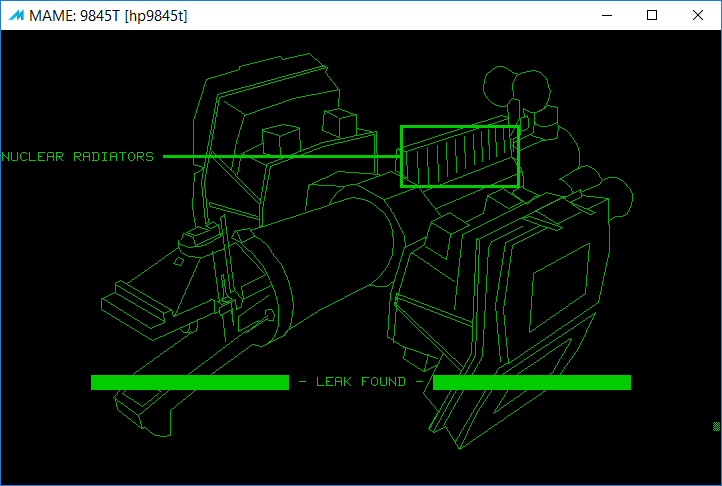
If you like to test the 45T emulation, I would recommend Francois Lanciault's awesome self-running demo. Simply execute
mame hp9845t -magt1 tapes/fldemo.hti
Then execute LOAD "FLDEMO" in the emulator, and run the demo with RUN. The demo mimics a fictional space ship display:
The name 45T actually is a bit misleading, since in fact we do not emulate the system which was once offered as HP 9845T (which was just an upgrade for the 9845B standard configuration towards a more complete setup with more RAM, a second tape drive, a built-in printer and of course graphics, like the HP 9845S was for the HP 9845A), but rather a standard HP 9845B with 98780A monitor top. Which in fact was never offered in that configuration. The 98780A was only delivered with a 9845B model 200 or as an upgrade in combination with the bit-slice LPU upgrade, all for the sake of a more powerful PSU, which was required also to drive the 98780A monitor.
Anyway, here we are thinking practical, and since the Model 200 is not yet emulated, but the 98780A is, and since the emulator has no idea of how much power it needs, for your convenience we simply use the name 9845t for the fast monochrome version of the 9845b.
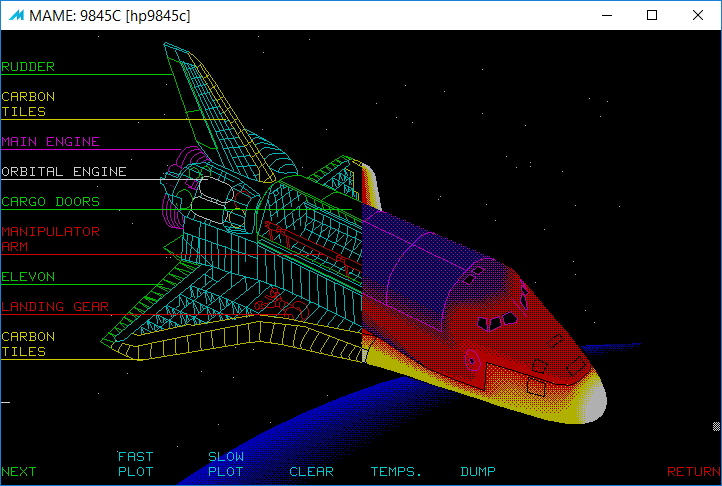
HP 9845C Demo
A nice example for testing the HP 9845C emulation is the 45C Demo Application. Since that program uses two tape cartridges, you need to mount both at the same time. Please follow the steps:
- Execute
mame hp9845c -magt1 tapes/demo1.hti -magt2 tapes/demo2.hti
to launch the emulation.
For the light pen enabled version of the demo use
mame hp9845c -lightgun -lightgun_device mouse -magt1 tapes/demo1lp.hti -magt2 tapes/demo2.hti
- Execute LOAD "DEMO" within the emulation
- Run the demo in the emulator with 'RUN'
Wait until the program has loaded all data, then select the BLACK (PERF.) paper type with Shift+F11 (no matter which to choose, since printer is not emulated anyway). The demo now creates a full-colored menu where you can make your choices with the soft keys. Each soft key is represented by a label in the lowest two rows of the screen. Select the leftmost label with Shift+F8, then in the order from left to right Shift+F9, Shift+F10, Shift+F11, Shift+F12, RightCtrl+Shift+F10, RightCtrl+Shift+F11 and RightCtrl+Shift+F12 for the rightmost label:

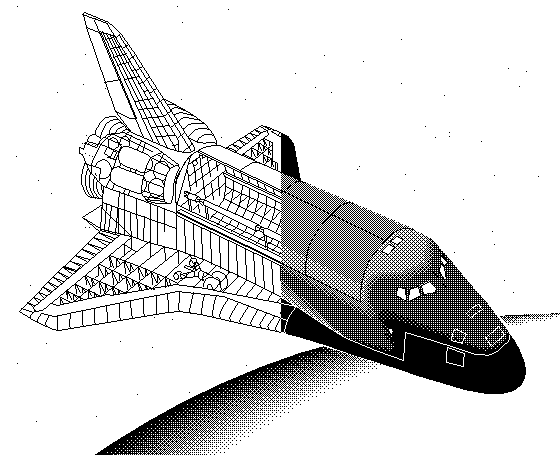
You may now either watch all the demos with RightCtrl+Shift+F12 (auto advance), or select each demo individually with the soft keys. To - for instance - select the Space Shuttle Demo, first select 'ENGINEERING' with Shift+F11 and then 'SPACE SHUTTLE' with Shift+F9. You now may play around with the options represented by the labels, e.g. use Shift+F12 to show LABELS or TEMP, or Shift+F9 to do a FAST PLOT:
Most of the 45C Demo is self-explaining, but there is also a manual available, see this link for download. Each of the six demo cathegories holds one demo which utilizes the light pen (always the last demo in each cathegory).
Debugging
One of the really nice features of MAME is the integrated debugger. You may set breakpoints, step through the 9845 code, and examine disassembly, IO and RAM locations as you like. Of course you can switch between the two processors (LPU and PPU). To enable the debugger, just add the '-debug' command line option. MAME starts but does not yet launch the emulation:
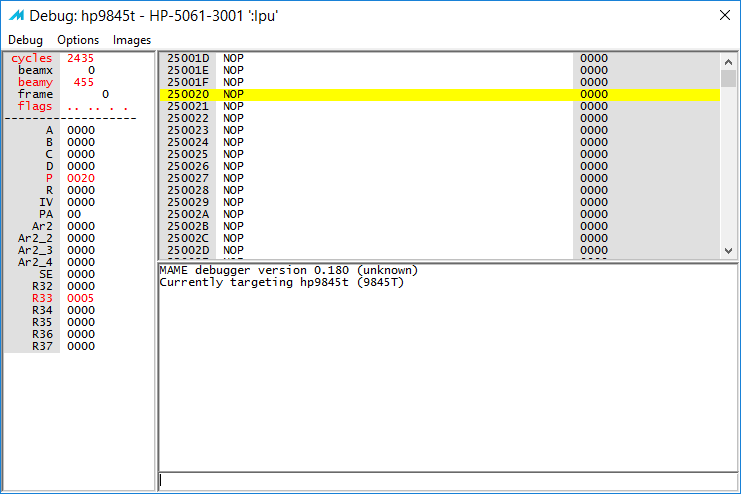
You now may open different debugger windows and set breakpoints. When ready, start the emulation with F5.
Building MAME
Downloading a ready-to-run MAME distro is quite convenient, but the binaries available for download sometimes do not reflect the latest official versions. If you like to build MAME in your own environment, follow these steps as a hint (I do not continuously track changes to the different environments which may require changes to the procedures described here).
- Prepare a proper build-environment. You'll need to install gcc with build tools and SDL for Linux and Mac OS, or the latest MinGW for Windows:
Windows:
Get the build tools from here: http://www.mame.net/tools and run the installer. Select C:\ as target. Run a Windows console in C:\msys64. Add C:\msys64\usr\bin to your PATH environment variable:
set PATH=C:\msys64\usr\bin;%PATH%
Then follow the instructions for updating the build tools on http://www.mame.net/tools.
Fedora:
sudo yum install git gcc gcc-c++ python SDL2-devel SDL2_ttf-devel libXinerama-devel qt5-qtbase-devel qt5-qttools expat-devel fontconfig-devel alsa-lib-devel
Debian (or Ubuntu):
sudo apt-get install git build-essential libsdl2-dev libsdl2-ttf-dev libfontconfig-dev qt5-default
Mac OS:
See http://docs.mamedev.org/initialsetup/compilingmame.html for details
- Clone the MAME repository from github:
git clone https://github.com/mamedev/mame.git
or simply download and unpack the source package from https://github.com/mamedev/mame as Zip file.
- If you like, apply the patch for the 8" floppy sound support (this patch is optional, you may skip it, also you need a working patch program for applying the patch). Download hp9845-mame-src-patches.zip from the downloads section below, and unpack it to the mame source directory you have just created with the git command, then run from that directory
patch -p1 < mame-floppy8-sound.patch
- If not already there, change into the mame directory and issue
make TOOLS=1 SOURCES=src/mame/drivers/hp9845.cpp
to build the HP9845 emulator together with tools like imgtool.
Note: you may add '-j3' for a dual-core or '-j5' for a quad-core processor to speed up compilation. Also you may ommit the SOURCES directive if you want the full MAME/MESS emulator including all other machines (increases compilation time and binary size by an order of magnitude). Finally, you may like to strip the binary to further reduce its size.
- Create a home directory somewhere for MAME, where you unpack hp9845-mame-roms.zip and the supplementory files package hp9845-mame-supplements.zip from the downloads section below, and copy the newly built executables to that MAME directory. You may of course also create links from that directory to the executables.
The build normally should work without problems. However it may happen, that someone did a recent commit, which has not yet been tested on all platforms and produces errors during the build. In that case simply go back to an earlier version of the source code (or wait until it gets fixed :-)).
Please note that some features of the pre-built binaries provided here for download may not yet be contained in the official MAME distribution (see Downloads section below).
Troubleshooting
Problem:
Most common problem is that you get an ERROR 5 when entering a command.
Cause:
The 9845 uses at least three different keys for actions, which under Windows are all combined in the ENTER key:
CONT on a 9845 works like Windows ENTER for acknowledging user inputs and for continuing a program after a PAUSE or STOP
EXECUTE on a 9845 works like Windows ENTER for command execution
STORE on a 9845 works like Windows ENTER for source code entry when programming
In order to give the emulated 9845 exactly the key that it needs, CONT, EXECUTE and STORE are mapped on different PC keybord key combinations. So, if you like to execute a command like e.g. LIST, you have to use the ENTER key on the PC keyboard's keypad, or alternatively RIGHT-CTRL+ENTER. If you are using the normal ENTER key on a PC keyboard, that one is by default mapped to CONT, which gives you Error 5 (= abnormal program termination, because CONT can't find a program which can be continued). STORE is mapped to RIGHT-SHIFT+ENTER by the way. Also, MAME requires to activate extended PC keyboard mapping for the 9845 emulation, which is done by executing register_plugin. This is necessary because the 9845 emulation is using more keys than any other emulation in MAME.
Solution:
Run register_plugin before the very first use of MAME, and then use the ENTER key on the keypad instead of the standard ENTER key (or RIGHT-CTRL+ENTER) e.g. with the LIST command, and all should work well. See the Keyboard Section above for all mappings.
--
Problem:
Emulation shows an ERROR 80 when trying to access a floppy disk.
Cause:
9895A emulation sometimes doesn't properly initialize when mounted with the MAME file manager, resulting in an Error 80 (no floppy in drive) message in BASIC when trying to access ":H7".
Solution:
Mounting the floppy disk with -flop1 or -flop2 on command line or re-mounting the floppy disk image in the MAME file manager usually helps.
--
Problem:
MAME shows a Direct3D error on startup
Solution:
Add the '-video gdi' option when starting MAME.
Downloads
Click here for downloading sample builds and the ROM set for the HP 9845 emulator:
| Sample MAME build (HP 9845 emulator only) for 32-bit and 64-bit Linux, based on MAME 0.194, includes all required executables: | hp9845-mame-bin-linux-32.tgz hp9845-mame-bin-linux-64.tgz |
| Sample MAME build (HP 9845 emulator only) for 32-bit and 64-bit Windows, based on MAME 0.194, includes all required executables: | hp9845-mame-bin-windows.zip |
| ROM set for HP 9845 (system firmware plus Option ROMs): | hp9845-mame-roms.zip |
| Supplemental files for the HP 9845 emulator (includes some diagnostic/demo tapes and disks, scripts, samples & artwork): | hp9845-mame-supplements.zip |
| Patches to the MAME source code for things which are not yet in the official MAME source distro: | hp9845-mame-src-patches.zip |
Please note that some features of the build provided here for download may not yet be contained in the official MAME source distribution. Currently this includes support for 9895A 8" floppy sound.
More Information
See http://docs.mamedev.org for more information on MAME, including all command line options and tons of other stuff.
Please check the MAME license conditions on http://www.mame.net for license details.